Friday, September 23, 2011

A Sad Day


Today is a sad day. 
The rain has been trickling down like somber teardrops and I just now found out why. 
Marty, my short-term companion, is officially dead.


It’s not clear by the photo but poor Marty became the newest murder victim to an arachnid.

I initially came across Marty one particularly warm, early-September night, 
when she was sitting on our kitchen window. 


She wasn’t defensive or scared off by my camera flashes, instead she seemed almost interested. She continued to hang around the back of our house, to the point where it was normal to see her. 

Then one day she just wasn’t there…and more days followed without her presence.

It’s sad to see it end this way, especially when these are such unique insects, Marty in particular. However, her memory will live on, most of all, the incident where she ambushed me in the middle of the night and sat on my hand. Such an unpleasant incident at the time now seems like a great blessing, because I had the opportunity to meet her and ultimately I came to love those glassy bug eyes.


R.I.P. Marty
You will be missed

Friday, August 19, 2011

Hummingbird Feeder Success

We are proud to report that the hummingbird feeder is now visited by "regulars" :)
Fine feathered fowl...who are anything but foul to look at, can be seen at all hours of the day.

There are several things we've learned about them thus far:

1) They are territorial, well at least the males, and will happily chase each other away from the feeder.
2) They are plagued constantly by the evil-tempered Blue Jay who we witnessed chasing a small, fragile looking humming bird from tree branch to tree branch.
3) They've made our Weeping Cheery Tree into their "Home Tree", they nest in the protected center of the tree and can be seen fluttering around for brief seconds.
4) Just like people they have different personalities, while one is a major ham and poses for the camera another is extremely skittish and dodges out of sight whenever he sees us. 

Early Morning Hummingbird


Camera Curious Hummingbird


No matter how often we see these little guys, it's always an exciting experience :)


Enjoy!

Tuesday, August 9, 2011

Love 'Em Honey Bread


This book came to us as a gift and that's certainly the word we'd use for it. 
The recipes in here are what keep us best friends with our furry little companions, otherwise I don't think they'd like us so much.

Love 'Em Honey Bread
(about 6 loves or muffins or about 23 mini-muffins)


Muffin Mix

2 cups whole-wheat flour
2 1/2 teaspoons baking powder
2 large eggs
6-8 ounces sour cream or unflavored yogurt
     (we used CHOBANI Greek Plain Yogurt)
1/4 cup warm honey


Chicken Glaze

1/2 cup chicken broth
1 package unflavored gelatin 


For the Muffins

Set oven to 375 degrees, set out 2 cookie trays lined with mini-muffin cups.

In a large bowl, using a wire whisk, blend together flour and baking powder.


In a medium bowl, using a wire whisk, beat the eggs until thick and light-colored.


Beat in yogurt and honey.


Using a spatula or by hand, combine both mixtures until they form a dough.


Break off tablespoon-sized chunks of dough and roll them into balls with your hands.


Place each ball into a mini-muffin cup.


Bake for 10 minutes or until they are golden brown and a toothpick inserted into the center of each muffin comes out clean. 


Set aside on wire racks to cool.

For the Glaze

Mix 1 cup of boiling water with a chicken bouillon cube or packet of powder. Mix until dissolved. 


In a small bowl combine chicken broth and gelatin, stirring with a spoon until well mixed.


Place the cooled muffins back onto the cookie trays to avoid making a mess
...and believe us, we know all about messes...
With a brush or spoon, cover the top of each muffin with glaze.


Set aside to cool and to let the glaze form. Refrigerate leftovers.

Note: We've noticed that some dogs are sensitive to milk products, therefore we decided to use yogurt in place of sour cream so it would be easier on their little systems. Every dog is different though, become familiar with your own dog's system and use what works best for them.

Enjoy!

They certainly did, look at those tails go!


Yum :)


Tuesday, August 2, 2011

Hummingbird Feeder Setup

We had never thought of hummingbirds as being "pets" until we saw a section of supplies at a local store entitled Perky Pets. 
After that moment it was all over.
We knew we had to invest in some top quality products to entice these birds into paying us a visit. No matter what the cost or how much debt we would have to flounder through for them.
Basically, just about $12 later we walked out of our nearest Lowes with everything we needed.


Hummingbird Feeder
  (we bought a small 14.8 ounce one)
1 box Nectar Solution, store bought or homemade
  (we used store bought this time)
Hook for hanging
  (we bought a window suction-cup hook)


The very first thing we did, apart from buying all the needed equipment, was to wash the feeder and all of its parts in warm water. We then set it aside to dry. This assures us that no dirt or harmful particles remained on the feeder from its time at the store.


For the Nectar
(we doubled this recipe)

2 Tablespoons Nectar powder 
4 ounces of tap water


Next, we measured out the tap water. We decided to double this recipe in order to fill the feeder. So instead of 4 ounces of water, we used 8 ounces. 

Then we poured the Nectar powder. Since the recipe originally called for 2 Tablespoons we doubled it to 4 Tablespoons. 


Blend the powder into the water, stirring with a spatula until completely dissolved.  


Turning the feeder upside down we then filled it with the Nectar solution.


We screwed the bottom onto place and carried it upside down to prevent leaking.


We hung the hook onto the window, twisted the feeder hook into shape and hung our feeder.


Enjoy!

Update: A hummingbird was seen! ...On the opposite side of the house where the feeder isn't... :( 
but we're still holding out hope that they will discover our feeder in the close future.


Saturday, July 30, 2011

Apple Cinnamon Drops

It's been a while since we've cooked for the really important people in our lives...that's right...the pets!


One of our all-time favorite websites for homemade dog treats would have to be Bullwrinkle.com. 
One year while looking for a suitable birthday cake recipe, this site came up and we haven't looked back since. In fact, we come back every year for the very same recipe.  

However, with a lonely apple in need of using, we decided to give this scrumptious sounding treat a try.
This is one of those treats that has them literally sprinting to the refrigerator door, which is great when that's the only form of exercise your pets partake in. It's also one of the simplest dog treat recipes out there and smells absolutely incredible. Go ahead and try a bite, we won't tell ;)

Apple Cinnamon Drops
(about 3 dozen depending on size)


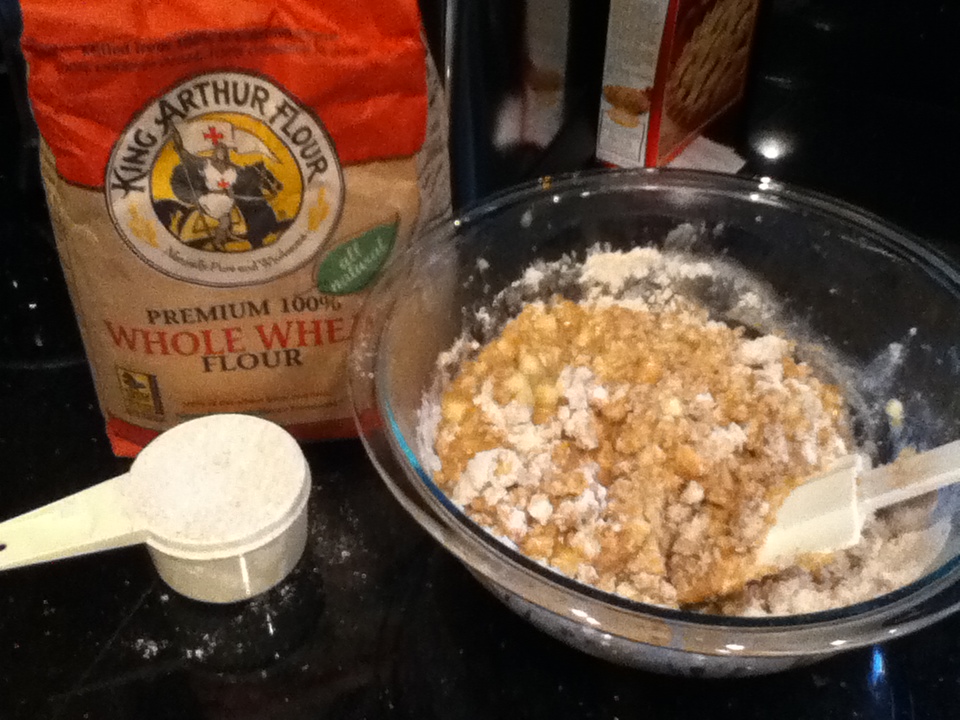
1 large apple (minced)
1/4 cup honey
1/2 cup water
1/2 teaspoon cinnamon
1 cup oatmeal (we used plain quick oats and an additional 1 cup of water)
1 1/2 cups whole wheat flour
1/8 cup whole wheat flour (kept separate for flattening cookies)


Set oven to 350 degrees and line two cookie trays with parchment paper. Parchment paper is less greasy than using wax paper, this will help keep the recipe as close to natural as possible.  

Wash, skin, core and mince the apple. In other words, cut it into tiny, non-choking-hazard pieces. You can do this by hand if you have the patience or use a chopper.


In a large bowl, combine plain oats and about 1 cup of boiling water, stir until well mixed. This creates the oatmeal mixture. 


Add minced apple, honey, water and cinnamon, stir until combined. 


Gradually blend in the wheat flour, adding enough to form a stiff dough. 


Spoon the dough by rounded teaspoon onto the lined cookie trays, spacing about 2 inches apart.


Our Food Enthusiast got a bit more than he bargained for when an unexpected hunk of dough accidentally came flying in his direction. He promptly ate it once the shock wore off. 


Pour the additional wheat flour into a separate, small bowl. Using a glass with a flat bottom, dip the glass in water and then into the wheat flour. This will help the flour stick to the bottom of the glass. 


Lightly press the bottom of the glass onto each cookie to flatten into a circle. 


Bake for 15-30 minutes (depending on how high your oven temperature runs) then flip each cookie and return to the oven for an additional 15-30 minutes to brown evenly on both sides.


Enjoy!